Jasmine Stitch

The Jasmine crochet stitch is a stunning technique that adds a unique, textured look to your crochet projects. Whether you’re making scarves, blankets, or decorative items, this stitch will make your creations stand out with its intricate, floral appearance.

Materials
Yarn: While any yarn can be used, softer, bulkier yarns are particularly recommended as they beautifully highlight the texture of the Jasmine stitch.
Hook: Choose a hook size that suits your yarn. For ease, consider using a hook one size larger than the yarn’s recommended size.
How to Crochet the Jasmine Stitch

Foundation: Start with a foundation chain in multiples of two plus one. Remember, this chain doesn’t count as a stitch; it’s just the base for your work.

Jasmine Stitch

Jasmine Stitch

Puff Stitch: The Jasmine stitch is essentially a series of interconnected puff stitches. Here’s how to create one:
Yarn over and insert your hook into the designated stitch.
Yarn over and pull up a loop to the height of your current row.
Repeat this process (yarn over and pull up a loop) four more times in the same stitch.
You should now have 11 loops on your hook.
Yarn over and pull through all the loops, then chain 1 to close the stitch.

Connecting Puff Stitches: After your first puff stitch, create the next one by working into the closing chain of the previous puff and one or two other stitches, depending on the pattern.
Continue working puff stitches into the loops of the previous ones, forming a chain of connected, puffed “flowers.”

Rows: Each row of Jasmine stitch builds on the previous one by connecting the puff stitches in a staggered pattern, creating a beautiful interlinked floral design.

Tips for Success

Tension: Keeping your tension consistent is crucial to achieving an even and professional look with the Jasmine stitch.
Practice: Since the Jasmine stitch involves handling multiple loops and ensuring they stay even, practice with scrap yarn before starting your main project. This will help you get comfortable with the technique.

Materials:

Yarn: Any medium-weight yarn (like worsted weight) is great for practice.
Hook: Use a hook size slightly larger than recommended for your yarn (e.g., if the yarn suggests a 5.0 mm hook, use a 5.5 mm or 6.0 mm hook).

Abbreviations:

ch: chain
yo: yarn over
ps: puff stitch

Pattern here:

Foundation Chain: Chain a multiple of 2 plus 1. For practice, start with a small number like 17 (16 + 1).
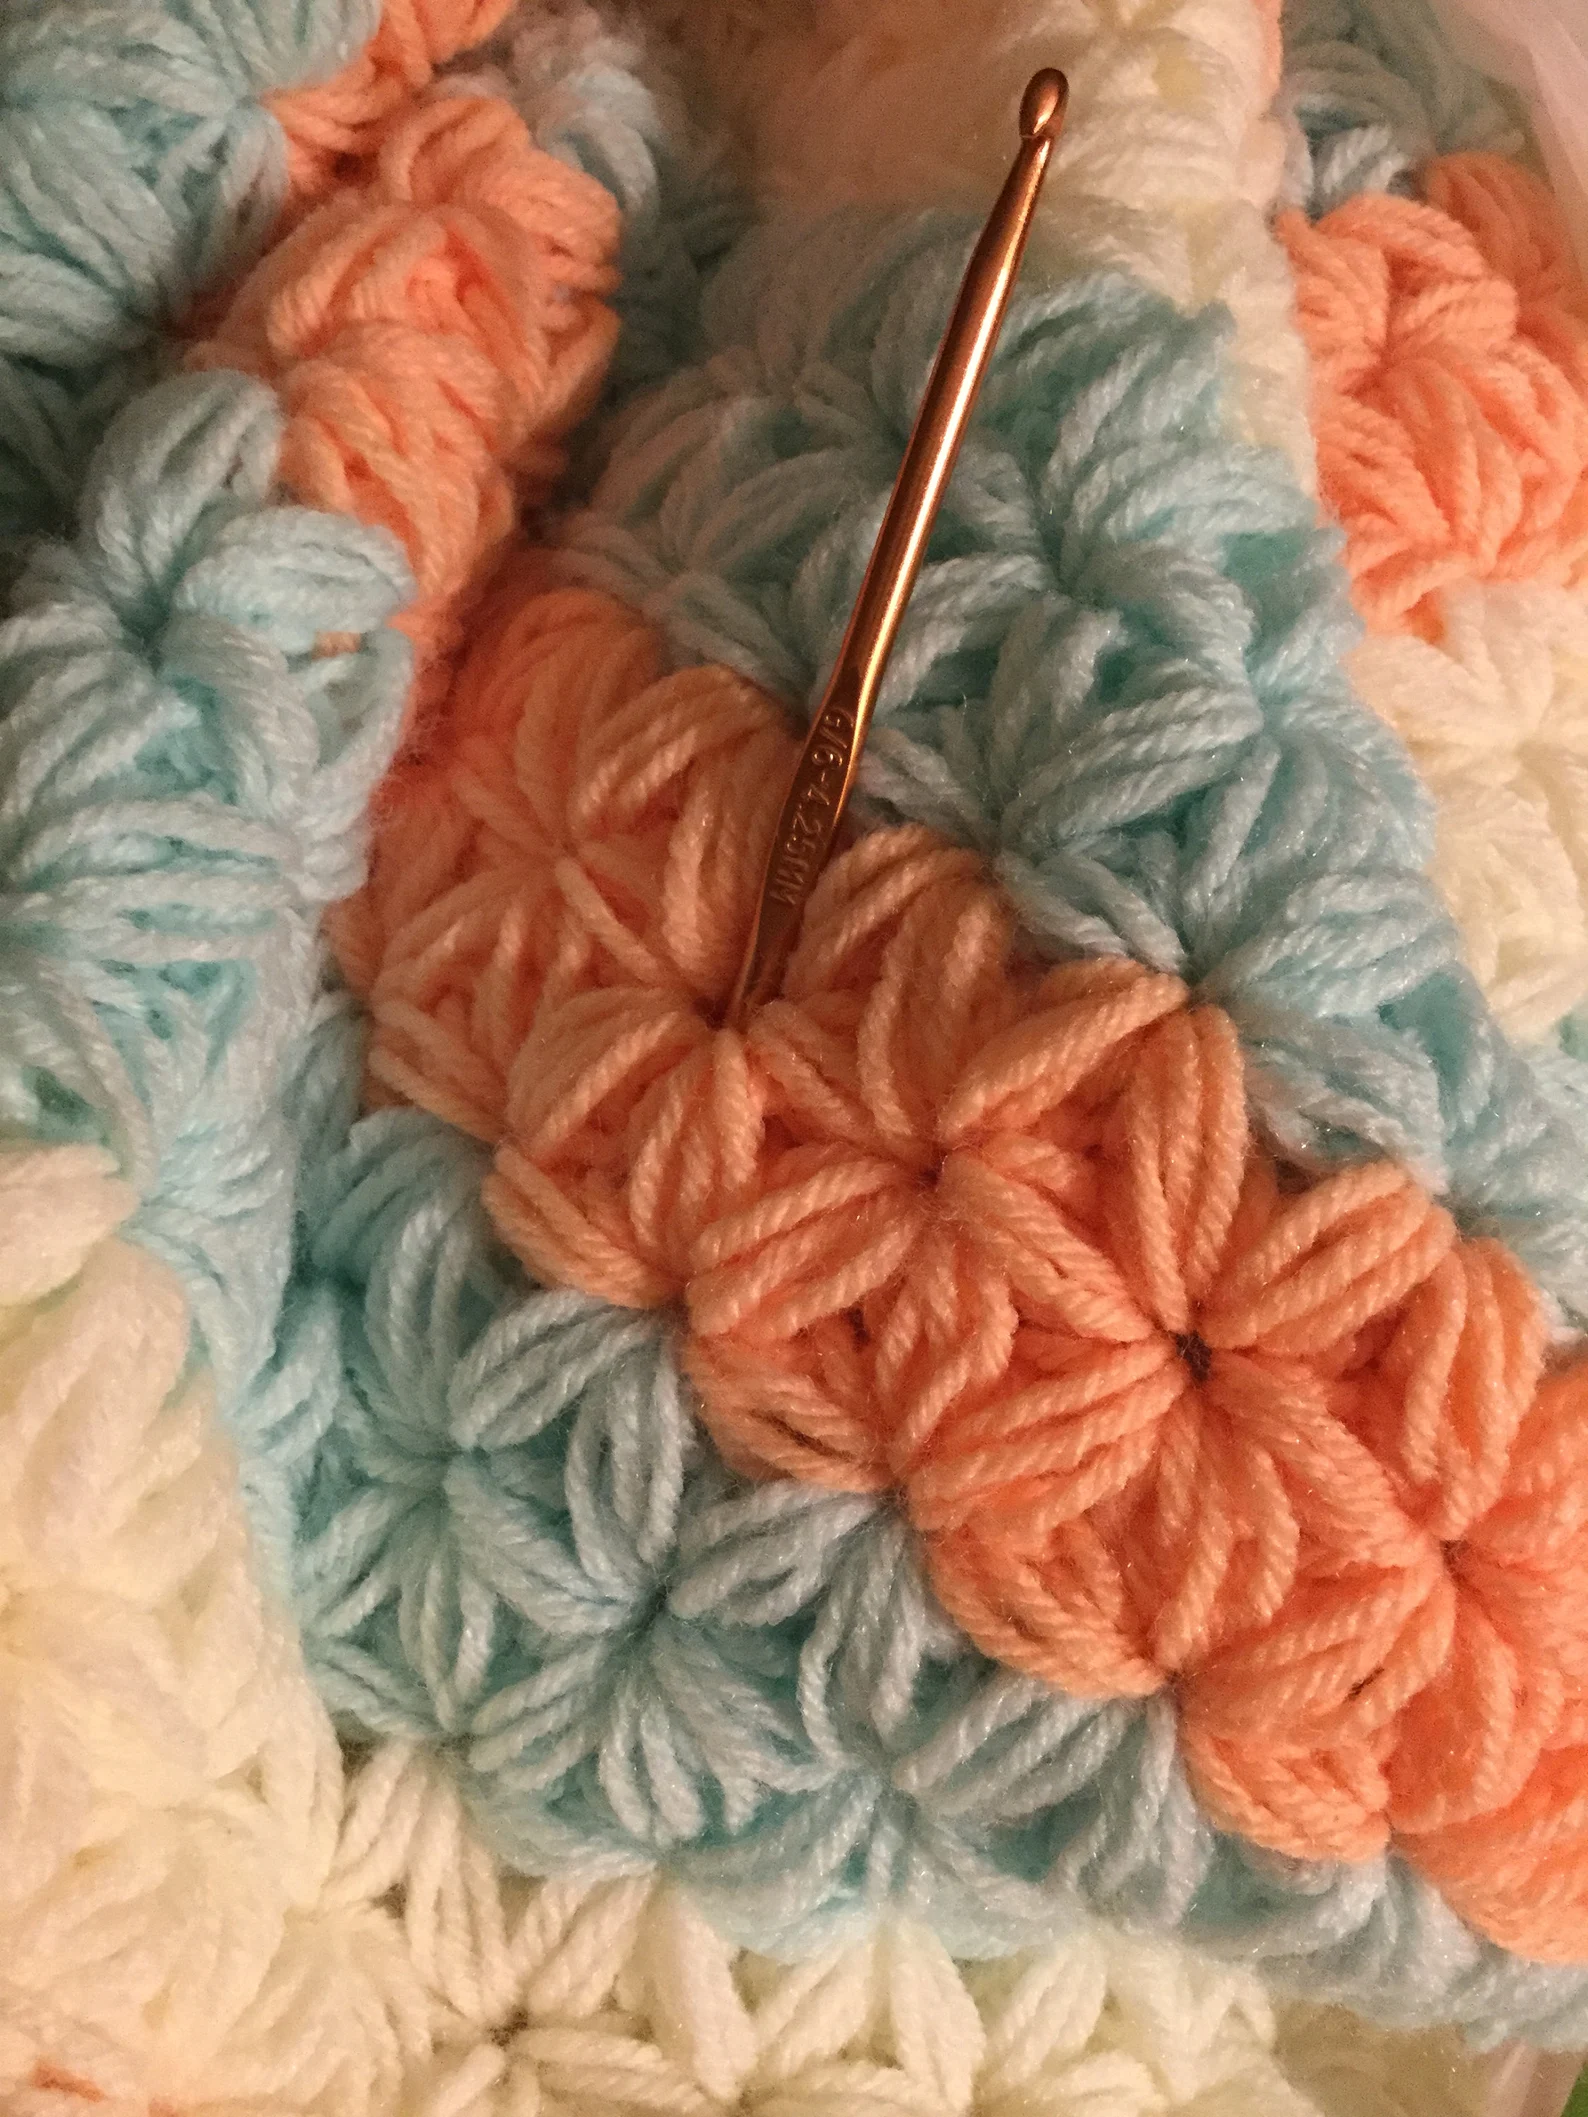
Row 1 (First Puff Stitch): Yo, insert your hook into the second ch from the hook, yo, and pull up a loop. Keep this loop loose.
Yo, insert your hook into the same ch, yo, and pull up another loop. Repeat this 3 more times until you have 11 loops on your hook.
Yo, and pull through all 11 loops on your hook.
Ch 1 to close the puff stitch.

Row 1 (Next Puff Stitches): For the next puff stitch, insert your hook into the closing ch of the first puff stitch, yo, and pull up a loop.
Yo, insert your hook into the next ch of the foundation chain, yo, and pull up a loop.
Yo, insert your hook into the same ch again, yo, and pull up another loop. Repeat until you have 11 loops on your hook.
Yo, and pull through all 11 loops. Ch 1 to close the puff stitch.
Continue this process across the row.
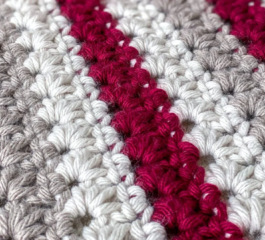
Jasmine stitch

Jasmine Stitch

Row 2 (New Row of Puff Stitches): To start the next row, create a puff stitch into the last closing ch of the last puff stitch from the previous row.
Yo, insert your hook into the first closing ch of the first puff stitch of the previous row, yo, and pull up a loop.
Continue as you did in Row 1, making sure to work into the closing ch of each puff stitch from the previous row. Continue: Keep repeating Row 2 until your swatch reaches the desired size.Finish: Fasten off and weave in ends.

If you find the puff stitches too tight or difficult to work with, try pulling your loops a little looser.
Practice making your loops even for a more uniform look.
This basic pattern will give you a small piece to practice with. Once you’re comfortable with the Jasmine stitch, you can incorporate it into larger projects like scarves or blankets. Enjoy your crafting!


You Are Here:

We use cookies to offer you the best experience on our website. By continuing to browse, you confirm that you accept these terms.