How to Create the Granny Spike Stitch

Crocheting is a delightful craft that offers an array of beautiful stitch patterns to explore. One of the timeless classics that every crocheter should have in their repertoire is the Granny Spike Stitch. This stitch is a variation of the classic Granny Square and features pronounced, eye-catching spikes. Whether you’re a crochet novice or an experienced enthusiast, learning how to create the Granny Spike Stitch can open up endless possibilities for your projects. In this tutorial, we’ll guide you through the steps to master this charming stitch.

The Granny Spike Stitch takes its inspiration from the traditional granny square, a well-known crochet motif often used to create blankets, afghans, and various other projects. What sets the Granny Spike Stitch apart is the incorporation of “spike” stitches. These spikes are created by crocheting into stitches below the surface, resulting in a 3D effect and a unique texture that adds depth to your work.

Materials Needed:

Yarn: Choose a yarn of your choice in your preferred color(s). You can use any weight of yarn, but for practice, a medium worsted weight yarn works well.
Crochet Hook: Select a crochet hook appropriate for your yarn weight. A hook size that matches your yarn’s label recommendation is a good place to start.
Scissors: For cutting the yarn.
Yarn Needle: Used for weaving in ends.


Key Characteristics of the Granny Spike Stitch:

Long and Spiky: The defining feature of the Granny Spike Stitch is its elongated stitches that rise above the fabric’s surface. These spikes are created by working treble crochets (or triple crochets) into the row below, leaving gaps between them.
Texture and Depth: The raised spikes lend texture and depth to your crochet work, making it visually appealing and engaging.
Versatile: While Granny Spike Stitch is commonly used in traditional Granny Square patterns, you can incorporate it into various projects, from blankets and scarves to bags and clothing.

Now, let’s get started with creating the Granny Spike Stitch:

Step 1: Make a Slip Knot

Begin by creating a slip knot. To make a slip knot, form a loop with the yarn, pass the working end through the loop, and gently pull to tighten. Insert your crochet hook into the slip knot.

Step 2: Chain

Start with a foundation chain. The length of your chain will depend on your project. For practice, create a chain of any desired length. Keep in mind that the Granny Spike Stitch pattern is typically worked in multiples of 3 plus 1 for turning.

Step 3: Single Crochet (Sc) Row

Begin by making a single crochet into the second chain from your hook. Continue making single crochets into each chain across the row. You should have one single crochet in each chain.

Dear crochet friend, did you like this pattern and want to see more tips on how to increase your crochet performance? See this suggestion we have separated for you:

3D Crochet Table Topper

Step 4: Turn Your Work

At the end of the row, chain 3 (this counts as your first double crochet) and turn your work.

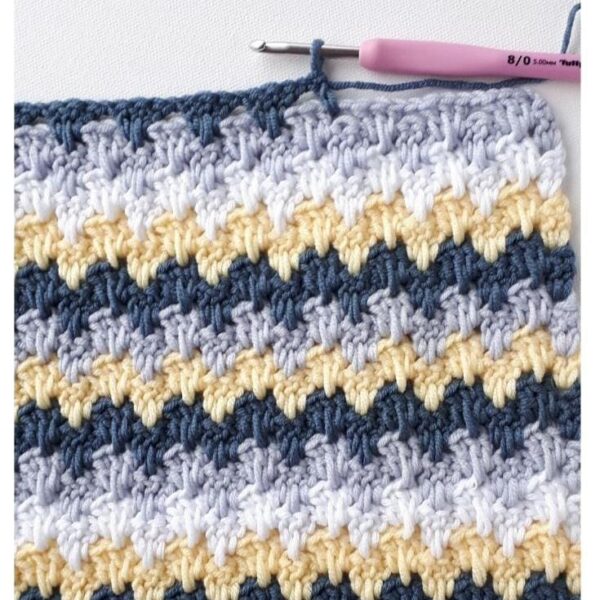
Step 5: Double Crochet (Dc) Row

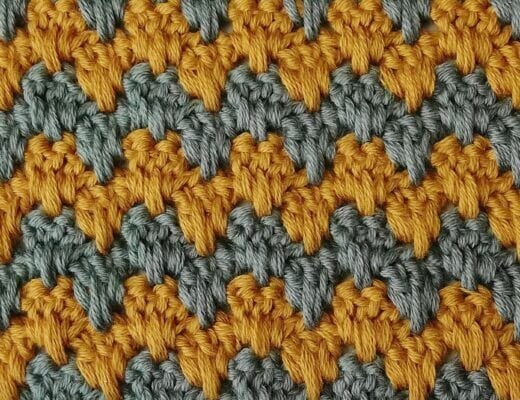
Work a double crochet into the first stitch (the turning chain space). To create a spike, skip the next stitch, and work a double crochet into the following stitch, allowing the skipped stitch to form a visible “spike” beneath the double crochet. This creates the distinctive texture of the Granny Spike Stitch.

Continue working this pattern across the row: Skip one stitch, double crochet into the next stitch. Repeat * to * across the row.
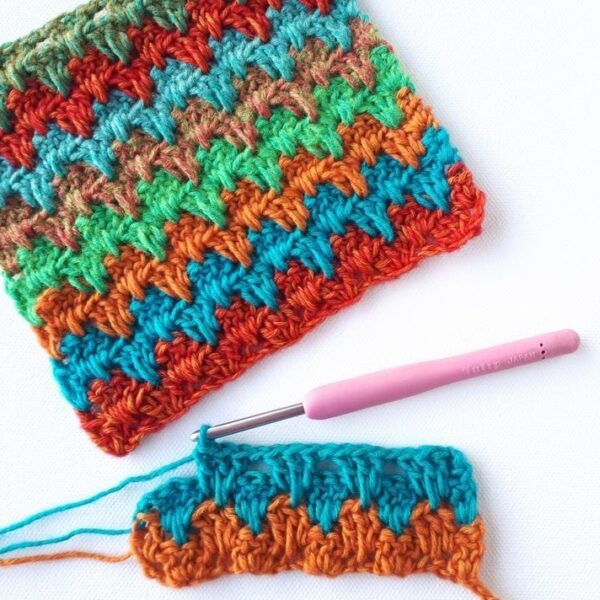
Step 6: Repeat Rows

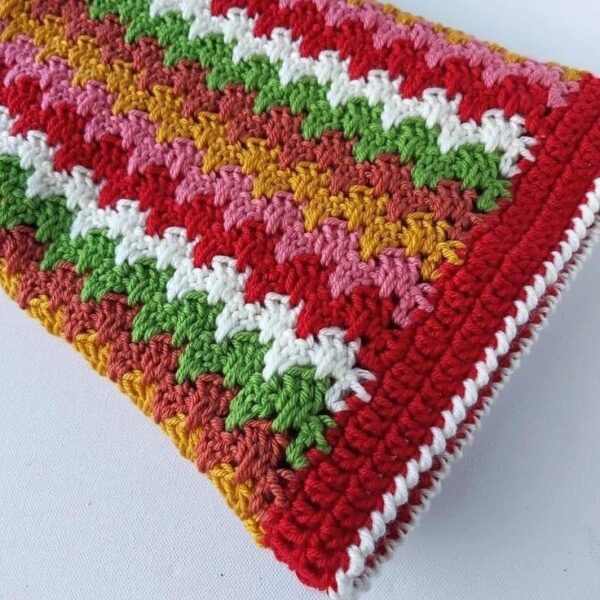
To continue the Granny Spike Stitch pattern, repeat Steps 4 and 5 until you’ve reached your desired length. You can change colors to create more intricate designs or stick with one color for a classic look.

Step 7: Finish and Secure

To finish your work, cut the yarn, leaving a tail of a few inches. Pull the yarn through the last loop on your hook to secure it. Use a yarn needle to weave in the loose ends.

Step 8: Block (Optional)

Blocking is a technique used to shape and smooth your finished piece. To block, dampen your work slightly, reshape it as needed, and allow it to dry flat.

Video Tutorial

Dear crocheter friend, if you learn faster by watching this pattern on video, we recommend the
tutorial from the Blossom Crochet channel. you can see the video here below

Did you like this tutorial and want it in PDF? We’ll help you, see the PDF below to review whenever you want.

Access the PDF/ Granny spike stitch
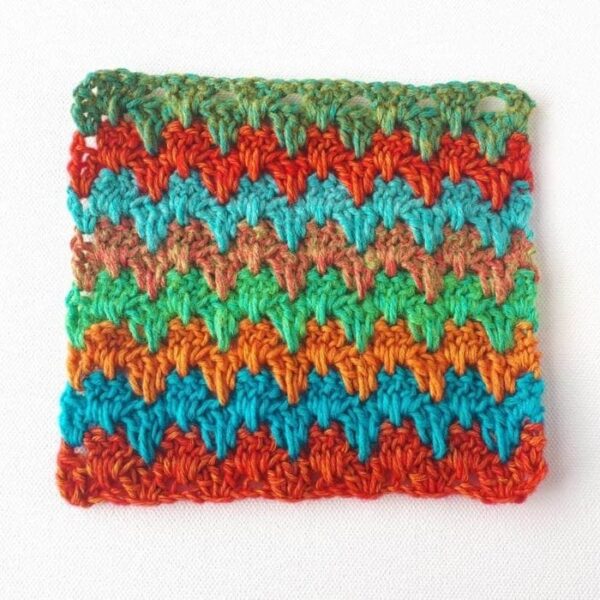
Conclusion

The Granny Spike Stitch is a versatile and visually appealing crochet technique that can elevate your projects to new heights. Whether you’re creating blankets, scarves, or decorative items, mastering this stitch opens up a world of creative possibilities. With a bit of practice, you’ll be able to incorporate the Granny Spike Stitch into your crochet repertoire, adding texture and dimension to your handmade creations. So, grab your yarn, crochet hook, and start exploring the wonderful world of crochet with the Granny Spike Stitch! Happy crocheting!

You Are Here:

We use cookies to offer you the best experience on our website. By continuing to browse, you confirm that you accept these terms.