How to create a pompom border

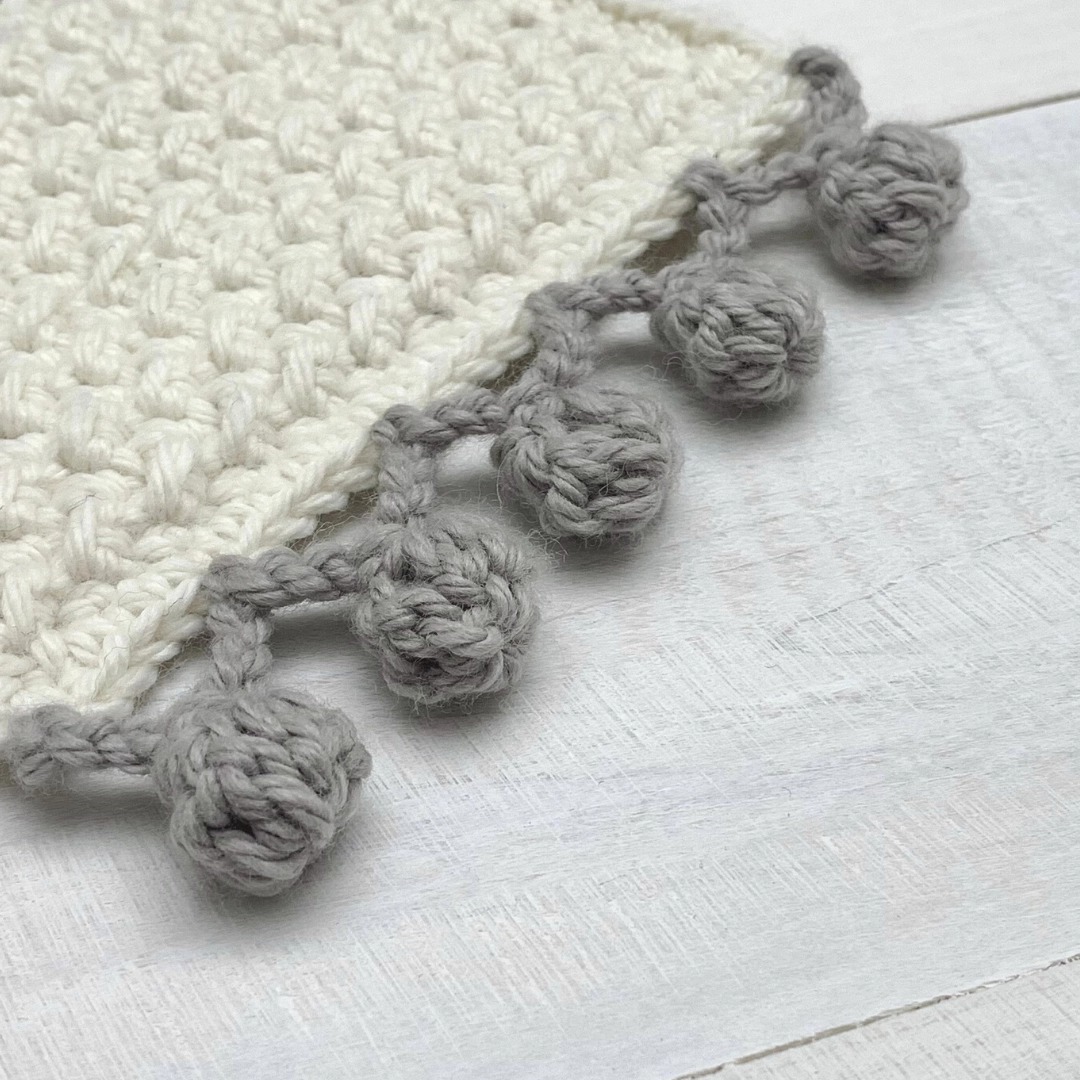
The border of a crochet blanket is more than just a decorative detail — it serves several important functions that enhance both the look and performance of the finished piece. Visually, a border gives the blanket a polished, professional appearance, making it look more complete and elegant. Whether you opt for a simple, classic edge or an intricate, lacy pattern, the border often becomes a standout feature that adds charm and character.

Beyond aesthetics, a well-crafted border plays a key role in unifying the blanket’s overall design. It helps smooth out uneven or jagged edges, especially in blankets composed of smaller motifs like granny squares or those with varied stitch patterns. This creates a cleaner, more cohesive look, tying all sections together seamlessly.

Functionally, a border increases the blanket’s durability by reinforcing the edges, which are typically more prone to wear and fraying. It can also add weight and structure, helping the blanket lay more evenly whether on a bed, sofa, or your lap. Additionally, the border offers a perfect opportunity for creativity and personal expression — you can choose a bold, contrasting color or stick with something that complements the main body of the blanket, making the piece truly your own.

Pompom border

Materials:
Yarn of your choice
Matching crochet hook
Yarn needle (for finishing)

Instructions:
Row 1:
Single crochet (sc) in each stitch around the blanket, making 3 sc in each corner to keep the edges flat.
Join with a slip stitch (sl st) to the first stitch.
Chain 1 (ch 1) and turn.

Row 2:
Single crochet in the first chain space, then:
* Chain 3 (ch 3), skip 2 spaces, single crochet in the next.
Repeat from * all the way around.
Join with a slip stitch to the first single crochet.

Row 3:
Ch 1 and turn.
Slip stitch into the next ch-3 space.

*Chain 5. Make 5 slip stitches in the 4th chain from the hook,
then 5 slip stitches in the 5th chain from the hook.
Slip stitch the posts together (draw the yarn through all loops on the hook).
Slip stitch into the same ch-3 space, then into the next ch-3 space.
Repeat from * to the end of the row.


Finishing:
Fasten off and weave in the ends using a yarn needle.

free PDF here

Conclusion: The pompom border is a fun and charming choice that transforms any simple blanket into a piece full of personality. In addition to adding texture and a playful touch, it is easy to make and can be adapted to different styles and colors. Whether to finish off a children’s blanket or to give a casual look to a more neutral piece, this border is a creative way to make your work unique. Experiment, play with combinations and, above all, enjoy the process of bringing your creation to life with this charming finishing touch!

You Are Here:

We use cookies to offer you the best experience on our website. By continuing to browse, you confirm that you accept these terms.