Crochet Heart Granny Square

Crocheting has long been celebrated as a creative and therapeutic hobby, allowing crafters to transform simple yarn into intricate and meaningful designs. One such design that has captured the hearts of many is the Crochet Heart Granny Square.

These charming squares are not only visually appealing but also serve as heartfelt tokens of affection. In this article, we will explore the art of creating Crochet Heart Granny Squares, providing you with step-by-step instructions and creative inspiration.

The Basics of Crochet Heart Granny Squares

A Crochet Heart Granny Square is a variation of the traditional granny square that features a heart-shaped motif in the center. These squares can be used in a multitude of ways, such as blankets, cushions, table runners, or even framed as wall art. To get started, you’ll need the following materials:

Materials:

Worsted weight yarn in your desired color(s).
Crochet hook appropriate for your yarn weight (usually around 5.5 mm or H/8).
Scissors.
Yarn needle for weaving in ends.

Abbreviations:

ch: chain
dc: double crochet
hdc: half double crochet
sc: single crochet
st: stitch

Step-by-Step Instructions:

Step 1: Crafting the Magic Ring
Initiate with a magical ring, or alternatively, chain 4 and connect the ends with a slip stitch to form a ring.

Step 2: Commencing the First Round
Round 1: Commence by chaining 3 (this serves as your initial dc for this round and the forthcoming ones). Work 2 dc into the ring, then chain 2. Repeat this pattern – 3 dc into the ring, chain 2 – two more times. Finally, join with a slip stitch to the top of the starting ch-3. Tug gently on the magic ring to close the central hole.

Step 3: Sculpting the Heart Shape
Round 2: Begin with a chain of 3, followed by a dc into the same stitch. Proceed to work 2 dc in the next 2 stitches, then continue with hdc in the subsequent 3 stitches, sc in the ensuing 3 stitches, hdc in the following 3 stitches, 2 dc in the subsequent 3 stitches, and conclude with dc in the last 2 stitches of this round. Join by executing a slip stitch to the top of the initial ch-3.

Step 4: Infusing Color into the Heart
Round 3: Attach your second color of yarn to any hdc stitch from the preceding round. Start with a chain 1, then work a sc in the same stitch. Subsequently, work sc in the next 2 stitches, followed by 3 sc in the next stitch (located at the center of the heart). Continue with sc in the next 2 stitches, and repeat the pattern – sc in the next 3 stitches, 3 sc in the subsequent stitch, sc in the next 2 stitches – two more times. Finally, complete this round by working sc in the last 3 stitches. Seal it off by joining with a slip stitch to the first sc. Cut the yarn and secure the ends.

Dear crochet friend, did you like this pattern and want to see more tips on how to increase your crochet performance? See this suggestion we have separated for you:

Granny Flower Coasters Free Pattern

Step 5: Adding the Final Flourish
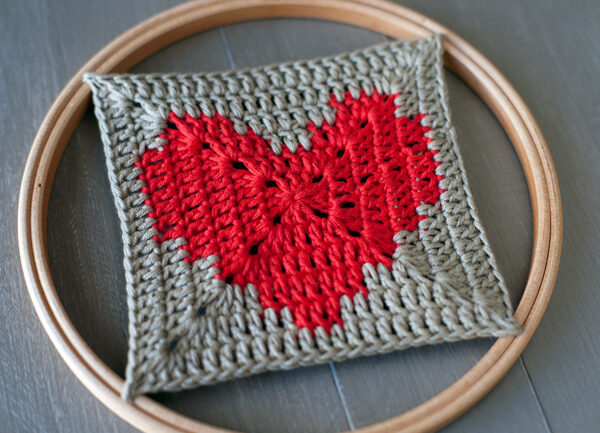
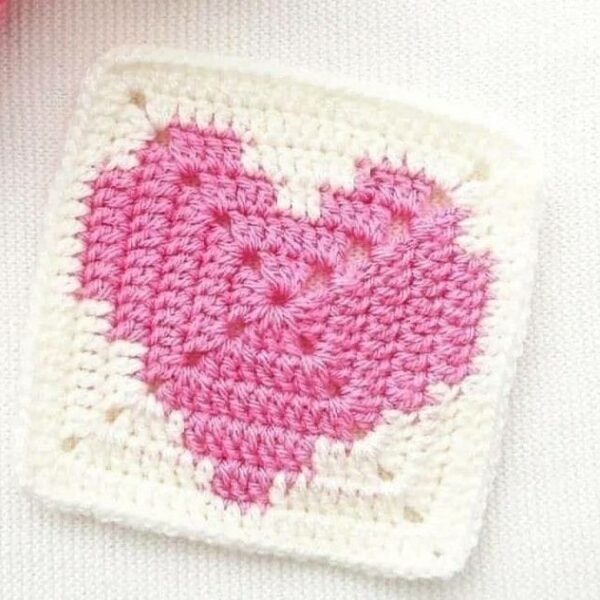
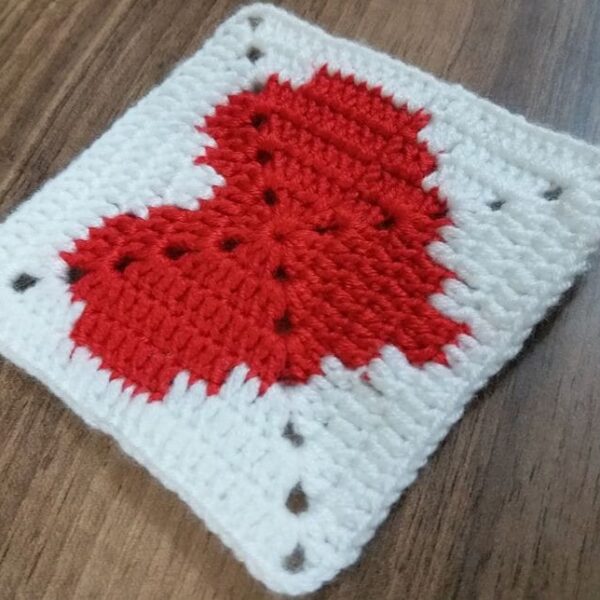
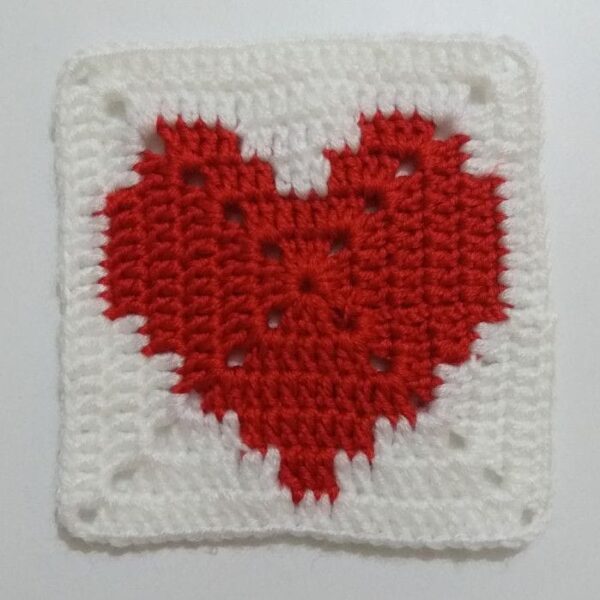
Gently stretch your Heart Granny Square and consider blocking it if desired, smoothing out the stitches and refining its shape.

Step 6: Multiplying the Squares
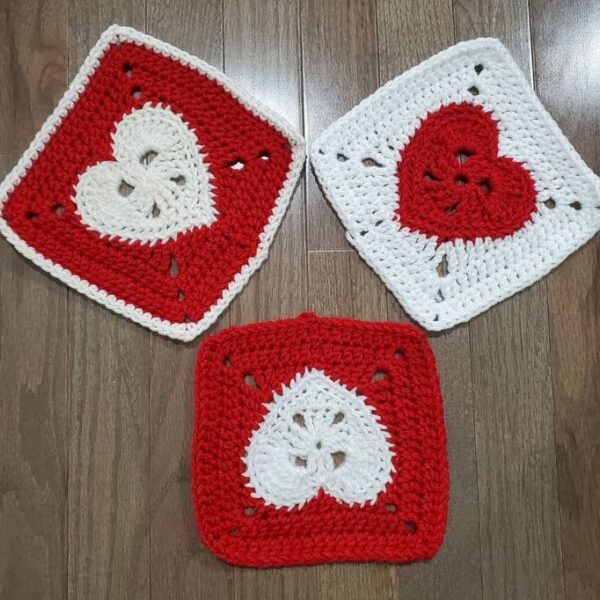
Revel in creativity by fashioning as many Heart Granny Squares as your project needs. Feel free to experiment with diverse color combinations and arrangements.

Step 7: Optional Assembly
If your endeavor entails a larger creation, such as a blanket, you can connect your Heart Granny Squares using slip stitches, single crochets, or your preferred method of joining.

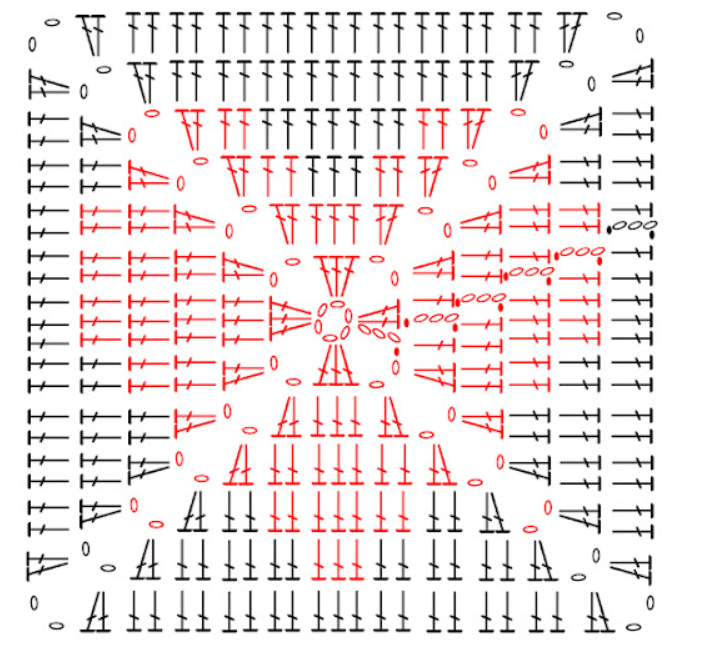
Crochet Heart Granny Square Diagram:

Crochet Heart Granny Squares Diagram

Crochet Heart Granny Square Diagram

Creative Inspiration

Once you’ve mastered the basic Crochet Heart Granny Square, the possibilities are endless. Here are a few ideas to spark your creativity:

Blankets: Create a heart-themed blanket by joining multiple Crochet Heart Granny Squares together. You can alternate colors or use a consistent palette for a harmonious look.

Pillows: Make a set of charming throw pillows by crocheting several heart squares and stitching them onto plain pillow covers.

Table Décor: Add a touch of love to your dining table by making heart square coasters or a heart-themed table runner.

Wall Art: Frame a single Crochet Heart Granny Square or a collection of them for delightful wall art that radiates warmth and affection.

Gifts: Craft personalized gifts for your loved ones. Incorporate Crochet Heart Granny Squares into scarves, bags, or even as motifs on clothing items.

Video Tutorial

For those who prefer video tutorials, we’ve got you covered. I recommend this comprehensive tutorial designed specifically for visual learners who enjoy video content more than following written instructions. The video was created by Kristine’s Day channel. You can find the video tutorial here.

For those who prefer PDF tutorials, we’ve got you covered. You can see this tutorial in PDF here below:

Access the PDF/ Crochet Heart Granny Square

And there you have it – a splendid collection of your very own Heart Granny Squares! Beyond being a delightful crafting experience, these squares possess versatility that extends to a multitude of applications. Whether you’re crafting a heartfelt gift or imbuing your living space with affectionate charm, these squares are certain to infuse your crochet projects with joy and warmth. Embark on your creative journey with enthusiasm and delight!

You Are Here:

We use cookies to offer you the best experience on our website. By continuing to browse, you confirm that you accept these terms.