Note: At this stage, there will be 17 (19-21) stitches for each Front section, 26 (30-34) stitches for each sleeve, and 32 (36-40) stitches for the Back section.
Dear crochet friend, did you like this pattern and want to see more tips on how to increase your crochet performance? See this suggestion we have separated for you:
Easy Baby Shoes
BODY
1st Row (Right Side – Dividing row):
Chain 3. Make 1 dc in each dc stitch until the next chain-2 space. Create 1 dc in the next chain-2 space. Chain 4 for underarm. Skip all stitches of the next Sleeve section. Make 1 dc in the following chain-2 space. Repeat this sequence once more. Finally, make 1 dc in each dc stitch until the end of the row. Turn. This row consists of 70 (78-86) dc stitches and 2 chain-4 spaces.
2nd Row:
Chain 3. Create 1 dc in each stitch and chain across the row. Turn. This row consists of 78 (86-94) dc stitches.
3rd Row:
Chain 3. Make 1 dc in each dc stitch across the row. Turn.
Repeat the last row pattern until the Body measures 6 (8-10)” [15 (20.5-25.5) cm] from the underarm. Fasten off.
SLEEVES
Note: Turn your work at the end of each round of the Sleeve to maintain the same texture as the Body.
1st Round (Right Side):
Join the yarn with a slip stitch in the 3rd chain of the underarm chain. Chain 3 (this counts as a dc). Make 2 dc in the next chain. Make 1 dc in each dc stitch of the Sleeve. Make 2 dc in the next chain from the underarm chain. Finally, make 1 dc in the last chain. Join with a slip stitch to the top of the chain 3.Turn. This round consists of 32 (36-40) dc stitches.
2nd Round (Wrong Side – Decreasing round):
Chain 3. Work a dc2tog (double crochet 2 together). Then, make 1 dc in each dc stitch until there are 2 stitches remaining. Work another dc2tog. Join with a slip stitch to the top of the chain 3.Turn. This round consists of 30 (34-38) dc stitches.
3rd Round:
Chain 3. Make 1 dc in each dc stitch around. Join with a slip stitch to the top of the chain 3.Turn.
Repeat the 2nd and 3rd rounds 4 (6-7) more times. This will leave you with 22 (22-24) dc stitches.
Continue repeating the 3rd round until the Sleeve measures 6 (8-9)” [15 (20.5-23) cm] from the underarm. Fasten off.
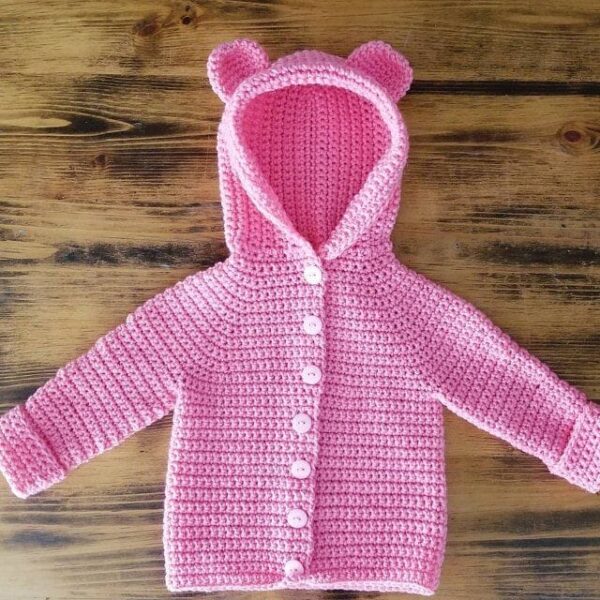
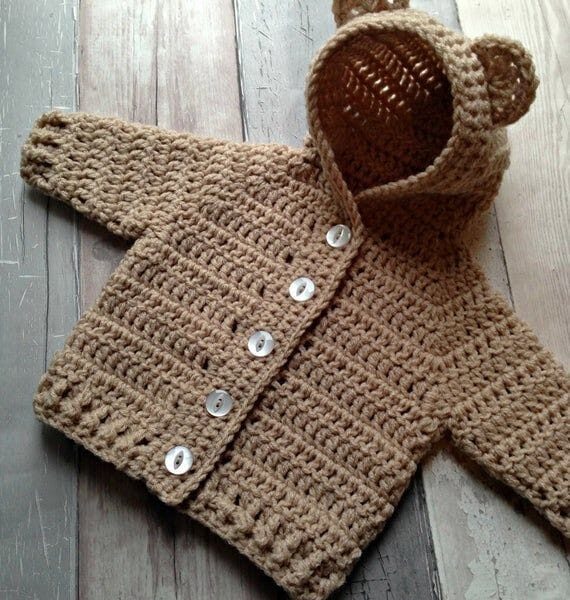
HOOD
1st Row (Right Side):
Working into the back loops of the foundation chain, skip the first chain. Join the yarn with a slip stitch in the next chain. Chain 3. Make 1 dc in each of the next 17 chains. Repeat (2 dc in the next chain) 14 times. Finally, make 1 dc in each of the last 18 chains. Turn. Leave the last chain unworked. This row consists of 64 dc stitches.
2nd Row:
Chain 3. Make 1 dc in each dc stitch across the row. Turn.
Repeat the last row until the Hood measures 8″ [20.5 cm] from the neck edge. Do not fasten off.
Join the top of the Hood: Fold the last row of the Hood in half, and while working through both layers, slip stitch in each stitch across to join the top of the Hood.
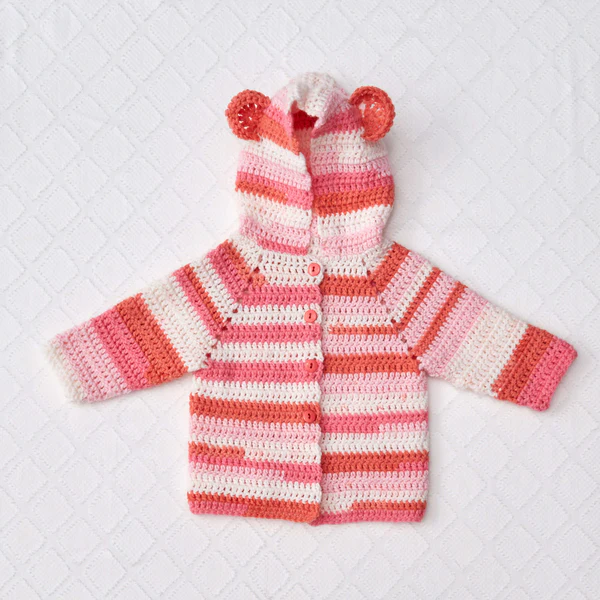
EARS (make 2):
Chain 5.
1st Row:
Create 6 treble (tr) crochet stitches in the 5th chain from the hook (the skipped chain 4 counts as a tr). Turn. This row consists of 7 tr stitches.
2nd Row:
Chain 4 (this counts as a tr). Make 1 tr in the first stitch (increase made). Repeat (2 tr in the next stitch) 6 times. This row consists of 14 tr stitches.
Fasten off, leaving a long tail. Use the tail to sew each Ear to the Hood, curving the Ear into a crescent shape as shown in the photo.
FINISHING
Sew 4 (5-6) buttons evenly spaced along the Left Front. Use coordinating spaces between the dc stitches along the Right Front to create buttonholes.

For those who prefer PDF tutorials, we’ve got you covered. The Tutorial was created by yarnspirations.com.
Access the PDF/ RED HEART BABY BEAR CROCHET HOODIE
We at Manual Crafts wish you all an excellent week full of joy, peace, love and of course, many crochets in our lives. It’s always good to have you here, until next time!