A Guide to Mini Log Cabin Bag Pattern

a world dominated by mass-produced items, there’s a growing appreciation for handmade crafts that radiate warmth and individuality. If you’re a crafting enthusiast looking for a project that combines creativity with functionality, the Mini Log Cabin Bag is the perfect endeavor to embark upon. In this article, we’ll explore the charm of manual crafts and guide you through the process of creating your very own Mini Log Cabin Bag.

The Art of Manual Crafts: Manual crafts hold a special place in our hearts, representing a departure from the impersonal and a return to the authentic. Crafting allows us to infuse our creations with a piece of ourselves, making each item a unique reflection of our personality and skill. The Mini Log Cabin Bag, with its rustic charm and practical design, is a testament to the enduring appeal of manual crafts.

Choosing the Right Materials: Before diving into the crafting process, gather the necessary materials for your Mini Log Cabin Bag. Consider using sturdy fabrics in earthy tones to enhance the rustic aesthetic. Cotton or canvas fabrics work well for the body of the bag, while leather or faux leather can add durability to the straps and accents.

Materials:

2 squares (5″ each) of red print fabric (for blocks)
18 squares (5″ each) of assorted cream prints and light blue prints (for blocks)
18 squares (5″ each) of assorted dark blue prints and black prints (for blocks and handles)
2 squares (5″ each) of blue print fabric (for handles)
3⁄8 yard of lining print fabric
3⁄8 yard of thin batting

Finished Bag Size: 8-1⁄2Γ—9-1⁄2Γ—1-1⁄2″ Finished Block Size: 3-1⁄2″

Note: Yardages and cutting instructions are based on a fabric width of 42″ and precut 5″ squares. All measurements include 1⁄4″ seam allowances. Sew with right sides together unless otherwise specified.

Cutting Instructions:

From the red print fabric, cut:
18 squares, each measuring 1″

From each cream print and light blue print fabric, cut:
1 rectangle measuring 1Γ—3-1⁄2″
1 rectangle measuring 1Γ—3″
1 rectangle measuring 1Γ—2-1⁄2″
1 rectangle measuring 1Γ—2″
1 rectangle measuring 1Γ—1-1⁄2″
1 square measuring 1″

From each dark blue print and black print fabric, cut:
1 rectangle measuring 1Γ—4″
1 rectangle measuring 1Γ—3-1⁄2″
1 rectangle measuring 1Γ—3″
1 rectangle measuring 1Γ—2-1⁄2″
1 rectangle measuring 1Γ—2″
1 rectangle measuring 1Γ—1-1⁄2″

From the lining print fabric, cut:
1 rectangle measuring 11Γ—21-1⁄2″

From the thin batting, cut:
1 rectangle measuring 11Γ—21-1⁄2″

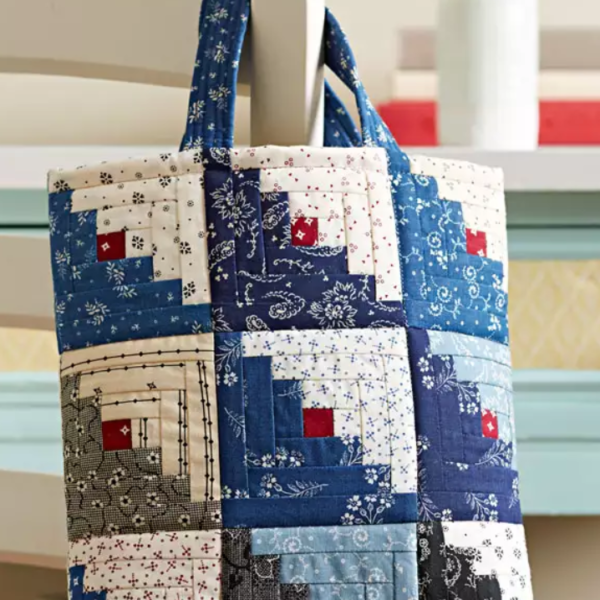
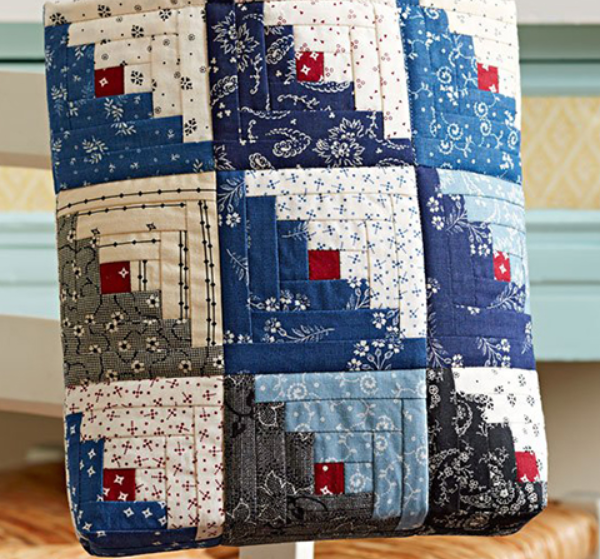
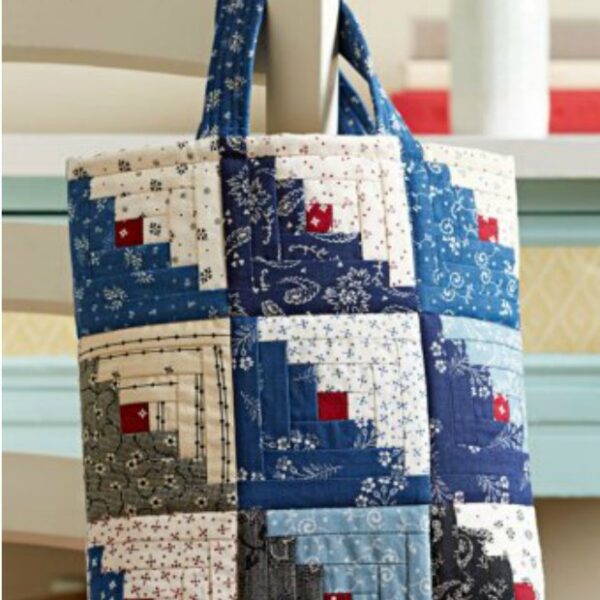
Assemble Log Cabin Blocks:

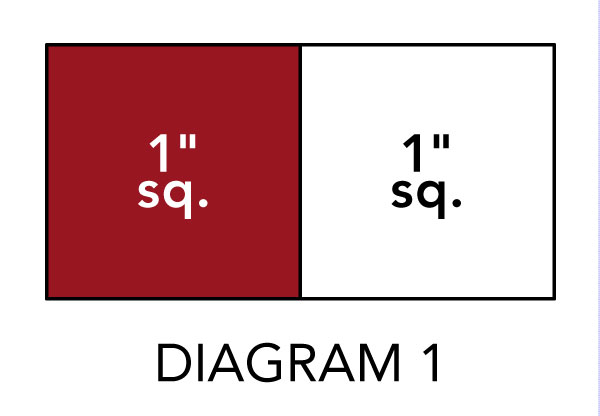
Begin by pairing a 1″ square of red print with a 1″ square of cream or light blue print (Diagram 1).

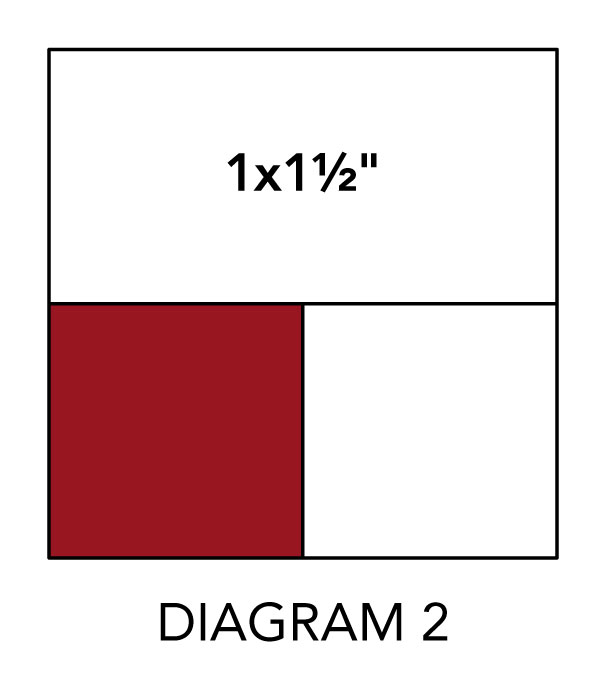
Extend the unit from Step 1 by adding a corresponding cream or light blue print 1Γ—1-1⁄2″ rectangle to the top edge (see Diagram 2).
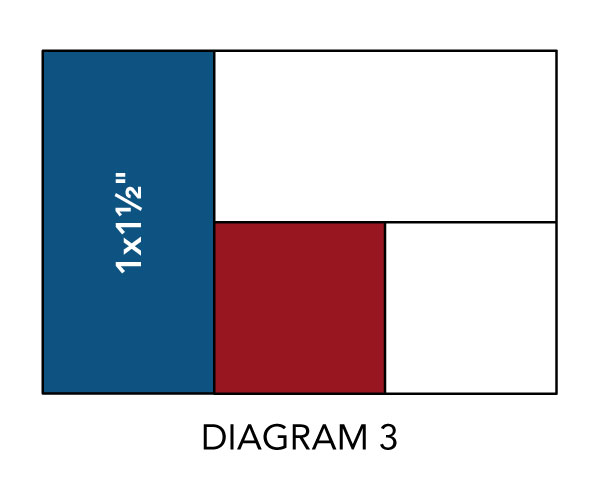
Attach a dark blue or black print 1Γ—1-1⁄2″ rectangle to the left edge of the unit from Step 2 (as shown in Diagram 3).

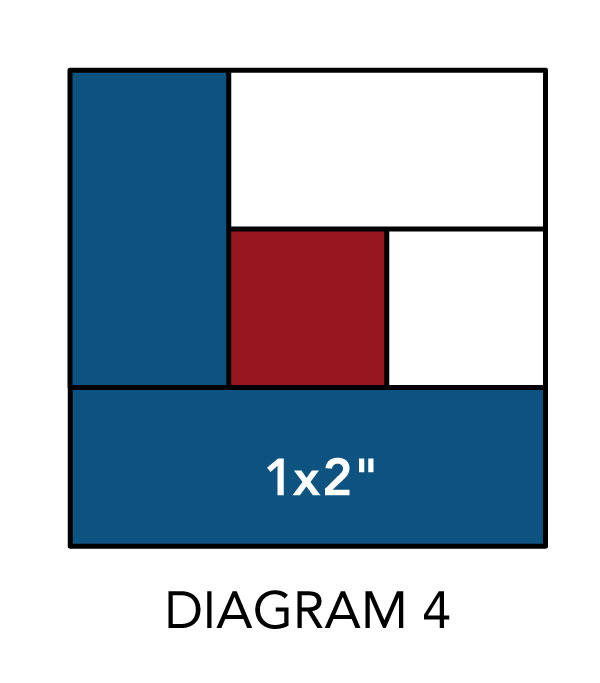
Further expand the block by adding a matching dark blue or black print 1Γ—2″ rectangle to the bottom edge of the unit from Step 3 (refer to Diagram 4).

Follow the counterclockwise sequence outlined in Diagram 5, adding rectangles and pressing seams toward the just-added rectangle. Ensure the block measures 4″ including seam allowances.

Repeat steps 1–5 to create a total of 18 blocks.

Assemble Handles:

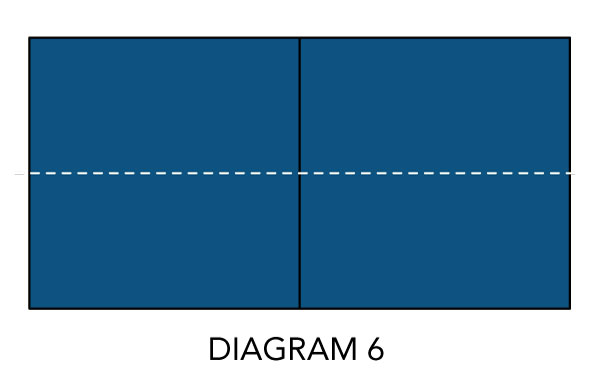
Combine blue print 5″ squares to create a 5Γ—9-1⁄2″ rectangle (see Diagram 6). Cut the rectangle in half lengthwise, forming two 2-1⁄2Γ—9-1⁄2″ strips for the handles.

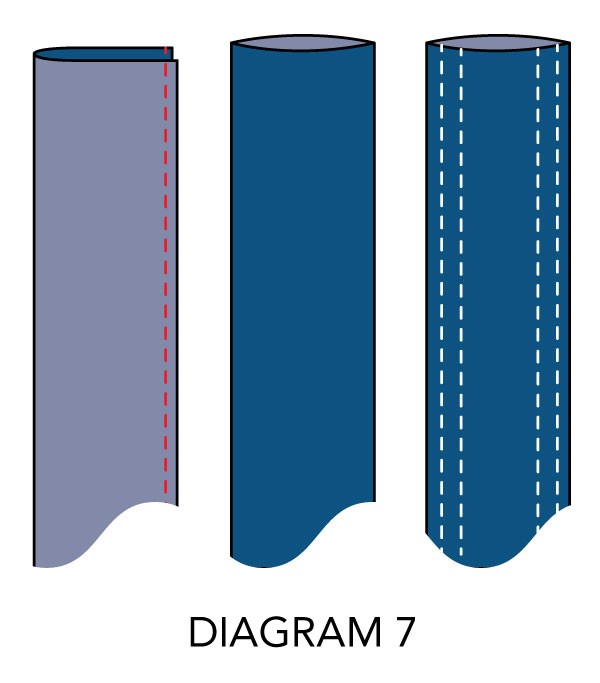
With the right side facing inwards, sew together the long raw edges of a strip from Step 1 (refer to Diagram 7). Turn the strip right side out, press, and center the seam on the underside.

Create a handle by sewing four rows of stitching 1⁄4″ apart on the strip from Step 2.

Repeat steps 1–3 to fashion a second handle.

Assemble Bag Body:

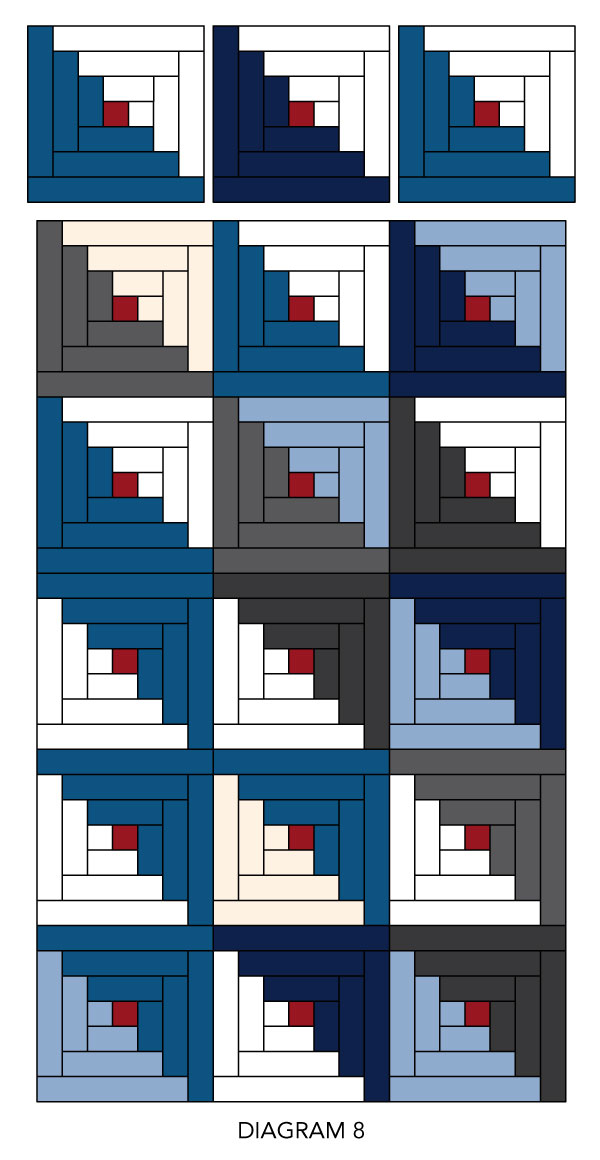
Arrange the blocks in six horizontal rows, paying attention to the position of the dark halves of the Log Cabin blocks (see Diagram 8).

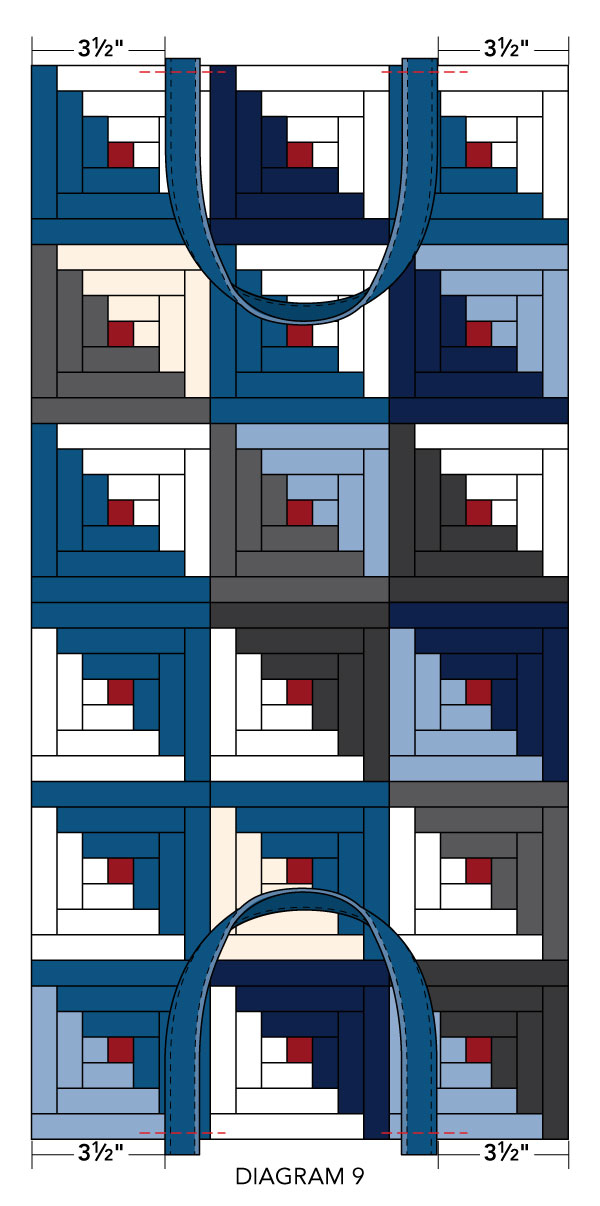
Sew the blocks together to form the bag body, pressing the seams in one direction. The bag body should measure 11Γ—21-1⁄2″ including seam allowances.

Position the ends of one handle along one short edge of the bag body, keeping them 3-1⁄2″ from each long edge. Baste in place and repeat with the remaining handle on the opposite short edge.
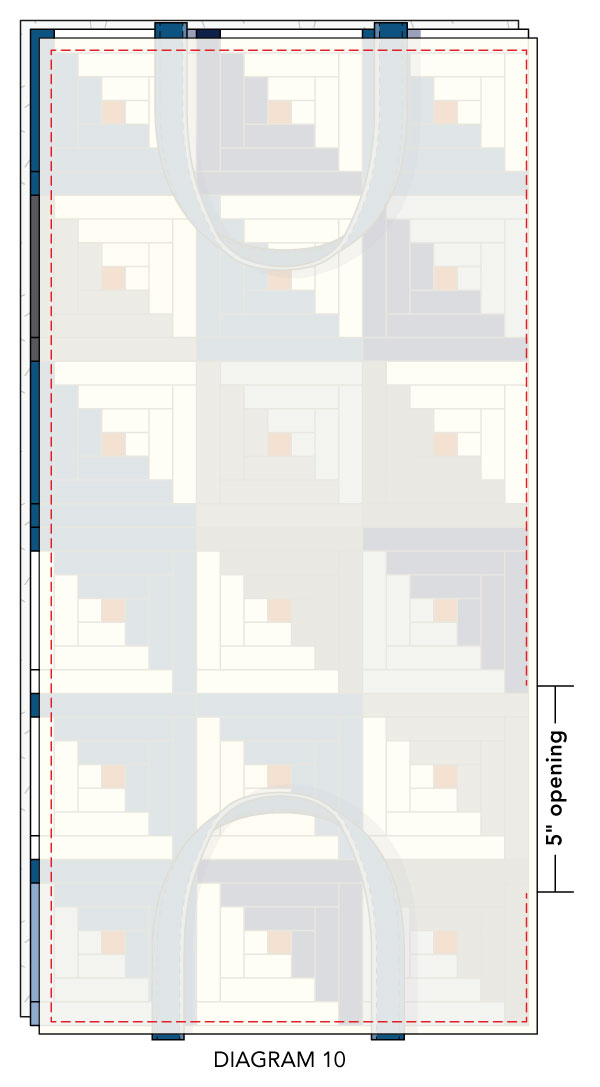
Align the 11Γ—21-1⁄2″ lining rectangle on top of the 11Γ—21-1⁄2″ batting rectangle with right sides together. Sew the layers together, leaving a 5″ opening for turning (see Diagram 10).

Turn the bag body right side out through the opening and slip-stitch it closed.

Quilt the bag body as desired. Barbara J. Eikmeier, the designer, recommends stitching between each Log Cabin block and topstitching around the bag body.

Finish Bag:

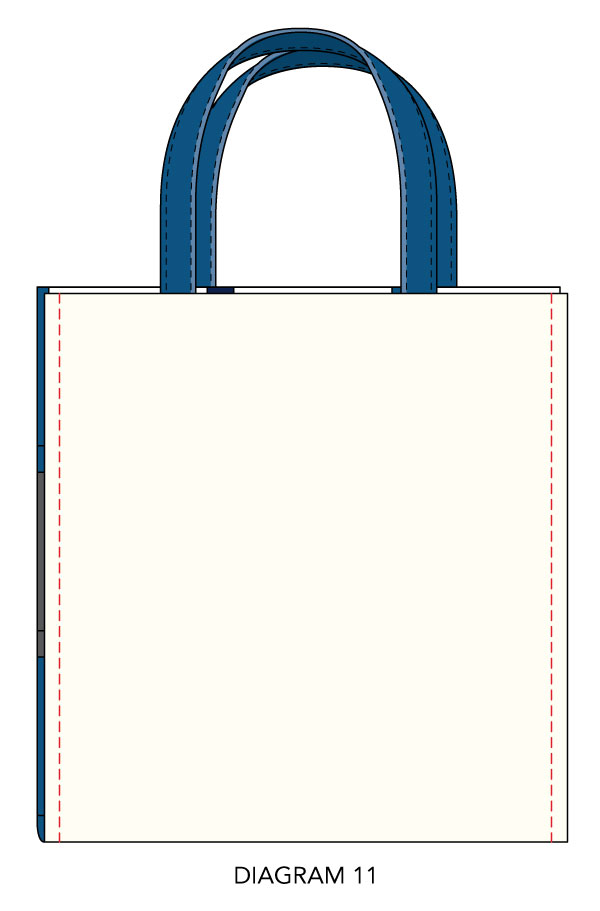
Fold the bag body in half with the right sides and handles together, forming a 10-1⁄2Γ—10-1⁄2″ square (see Diagram 11). Sew the side edges together to complete the bag.

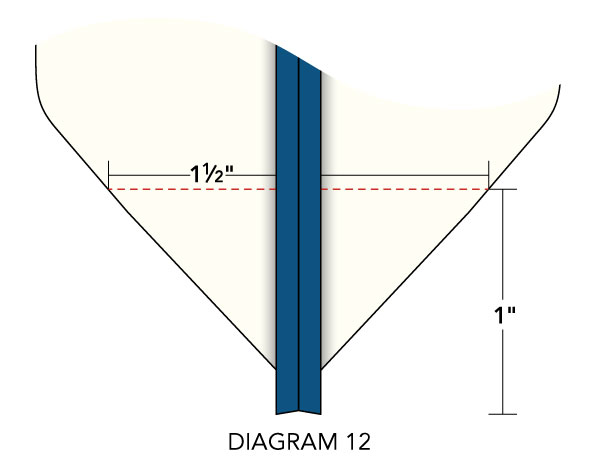
Shape the bag bottom by matching the side seam and bottom center of the bag at one corner to create a flattened triangle (refer to Diagram 12). Measure 1″ from the point of the triangle and draw a 1-1⁄2″-long line across the triangle. Sew on the drawn line. Repeat this process with the remaining corner.

Turn the bag right side out to complete the finished bag.

As you complete your Mini Log Cabin Bag, take pride in the fact that you’ve crafted something special and unique. Manual crafts like this not only yield a tangible and functional item but also offer a therapeutic and rewarding experience. So, gather your materials, embrace the art of crafting, and enjoy the journey of creating a Mini Log Cabin Bag that reflects your passion for handmade excellence.

The tutorial is available at allpeoplequilt.com.

We at Manual Crafts would like to thank each one of you for the affection and trust received. Besides, of course, wishing much peace, health and prosperity and not forgetting, many patterns to inspire us on a daily basis.

You Are Here:

We use cookies to offer you the best experience on our website. By continuing to browse, you confirm that you accept these terms.